A Timetable Module is a feature within an educational management system that helps in scheduling and organizing classes, events, and activities. It allows administrators and teachers to create, edit, and manage timetables for various academic terms, classes, and sections. The module ensures efficient allocation of resources like classrooms and instructors, and it provides students and staff with a clear, accessible view of class schedules
Create Time Table #
Note: Before Creating Class Time Table, Assign teacher to the subject. You can do this from
Subject>Assign Subject to Teacher>Select Class>Select Section>Get Subjects
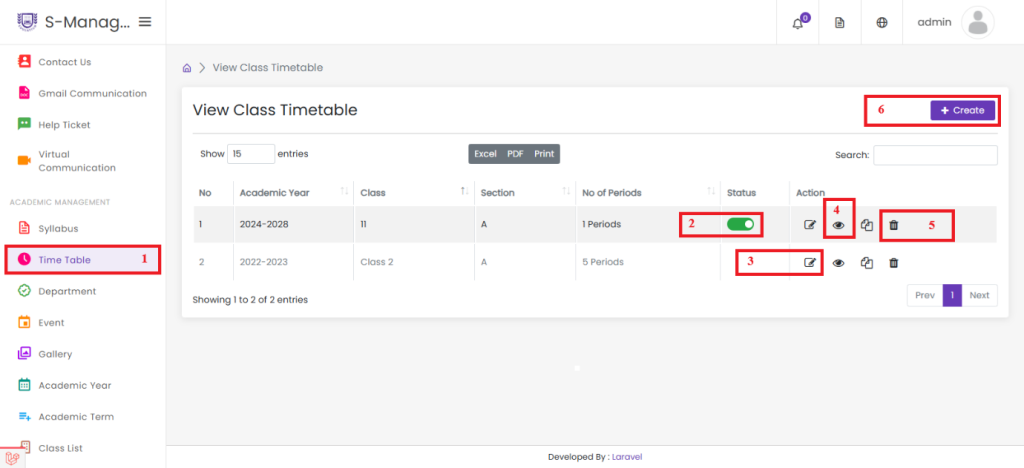
- Click on Timetable
- Click to Enable or Disable the Created Class Timetable
- Click to Edit the Created Class Timetable
- Click to View the Assigned Subject of the Created Class Timetable
- Click to Delete the Created Class Timetable
- Click to Create a New Class Timetable
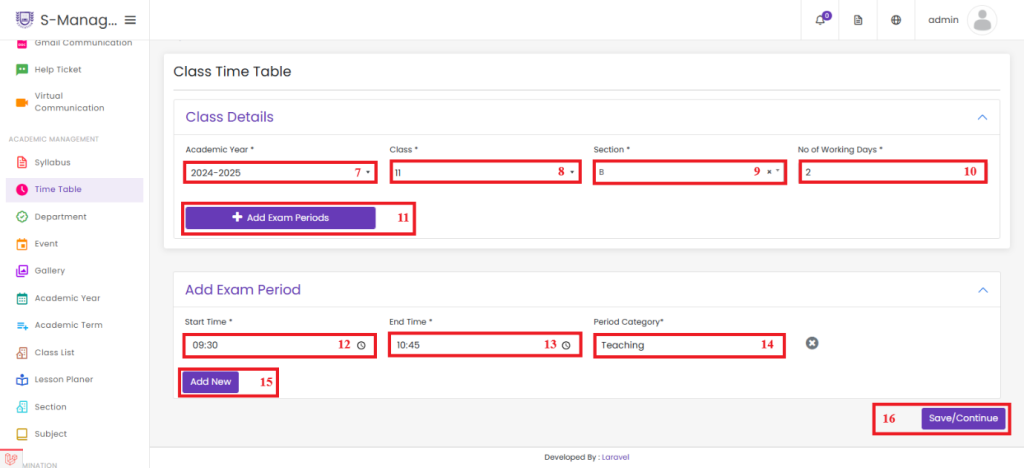
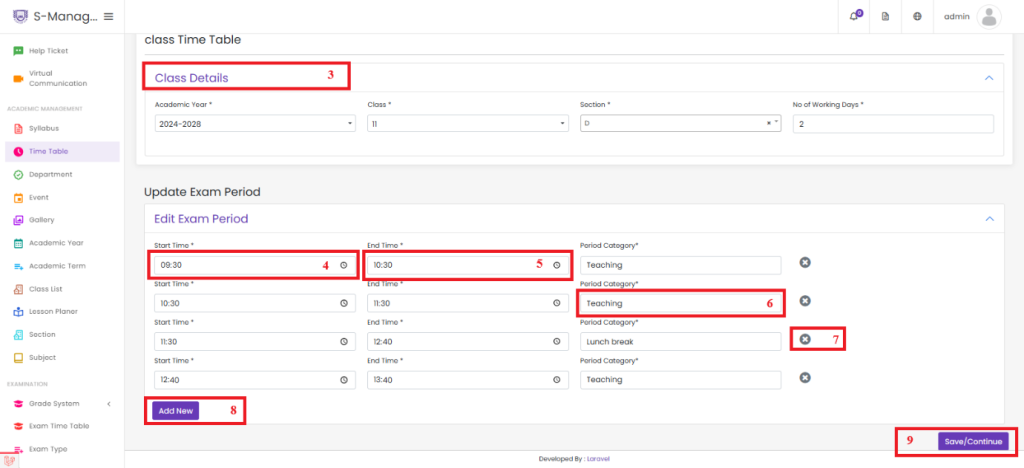
7.Select the Academic Year from the list
8.Select the Class from the list
9.Select the Section from the list
10.Enter the Number of Working days
11.Click to Add Exam Periods
12.Select the Start time of Period
13. Select the End time of Period
14.Select the Period Category, Which contains list of Teaching, Lunch break, Break,
Long Break and Short Break as need select from the list
15.Click to Add New period category, if Class time table required more period
16. Click to Save/Continue, Class Scheduling Time will be Created Successfully
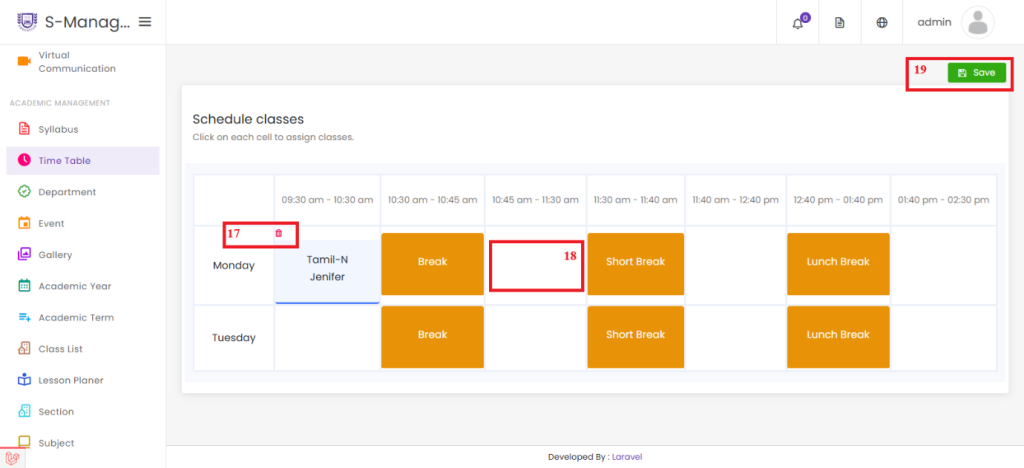
- Click the Delete Icon if the Assigned Period is No Longer Required
- Click on the Empty Period, then Select the Subject from the Dialog Box
- If a Color is Required for the Selected Subject, Choose the Desired Color
- Click to Assign the Subject
- Click Save to Successfully Create the Class Timetable
Cloning the Class Time Table #
Cloning the Class Timetable refers to creating an identical copy of an existing class timetable. This feature allows users to quickly replicate the structure, subjects, and schedules of a previously created timetable without having to manually re-enter all details. The cloned timetable can then be modified as needed for different classes or terms.
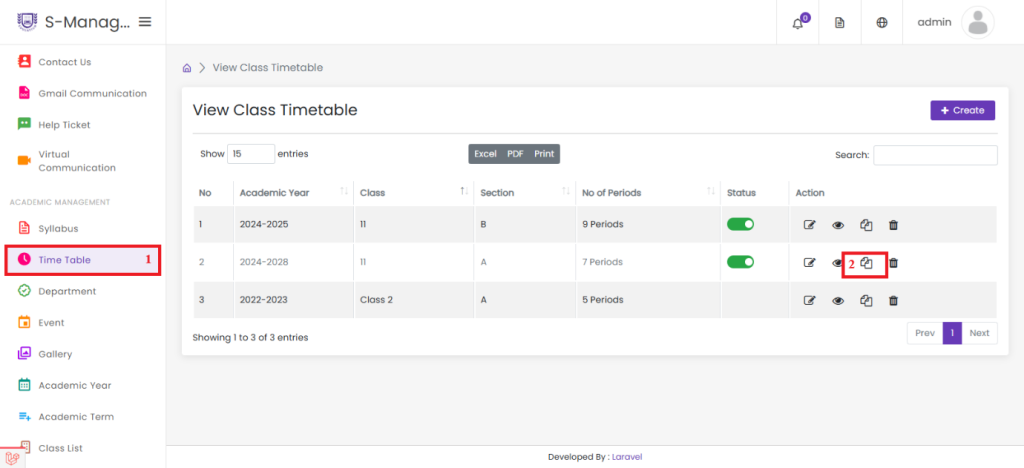
1. Click on Time Table
2.Click to Clone icon the Class Time Table
Here’s a rephrased version of your list:
- Make any necessary changes to the class details
- Select the Start Time for the Period Category
- Select the End Time for the Period Category
- Choose the Period Category from the list, including Teaching, Lunch Break, Break, Long Break, or Short Break, as required
- Click Close if the Existing Period Category is no longer needed
- Click Add New if a New Period Category is required
- Click Save/Continue to Successfully Create the Class Scheduling Time.
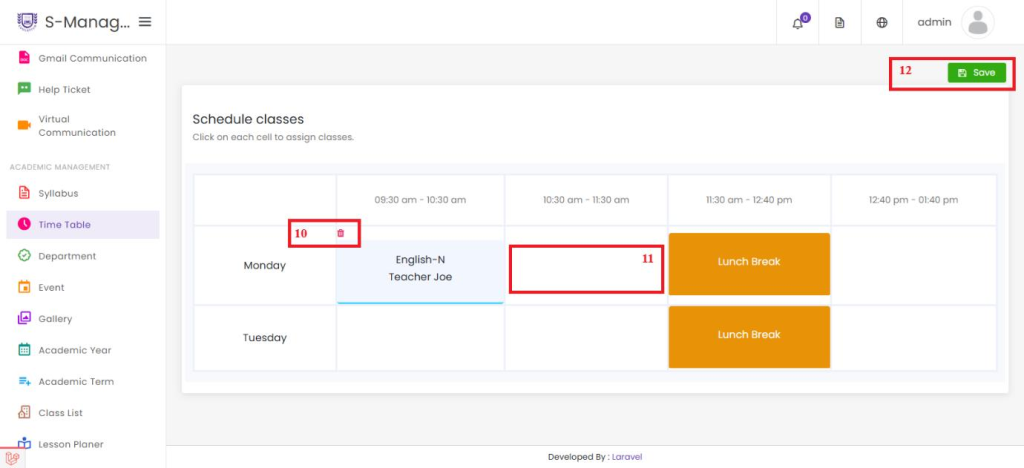
- Click the Delete Icon if the Assigned Period is No Longer Required
- Click on the Empty Period, then Select the Subject from the Dialog Box
- If a Color is Required for the Selected Subject, Choose the Desired Color
- Click to Assign the Subject
- Click Save to Successfully Create the Class Timetable


