The Gmail Communication Module enables users to send, receive, and manage emails efficiently. It supports features like message threading, spam filtering, search, labels, and integration with Google Chat and Meet for real-time communication. Designed for both personal and professional use, it ensures secure, organized, and seamless email communication across devices.
Create Internal mail Communication #

- Click on Gmail Communication
- Select to view Internal Composed - Received Mail
- Select to view Internal Composed - Starred Mail
- Select to view Internal Composed - Sent Mail
- Select to view Internal Composed - Draft Mail
- Select to view Internal Composed - Deleted Mail
- Click to Create New Internal Composed Mail

- Select the User Group from the list
- Choose Individual or Multiple Recipients
- Enter the Subject of the Internal Composed Mail
- Enter the Description or Message Body
- Click to Upload Attachments for the Internal Composed Mail
- Click Draft to save the Internal Composed Mail as a draft
- Click the Send Icon to successfully send the Internal Composed Mail to the selected individual or multiple users
Create External mail Communication #

- Click on Gmail Communication
- Select to view External Composed - Sent Mail
- Click to Create New External Composed Mail

- Select the User Group from the list
- Choose the Individual Email or Multiple Emails of the users
- Enter the Subject of the External Composed Mail
- Enter the Description or Message Body
- Click to Upload Attachments for the External Composed Mail
- Click the Send Icon to successfully send the External Composed Mail to the registered email address of the selected individual or multiple users
Creating Group in mail Communication #

- Click on Gmail Communication
- Click to Create a New Group
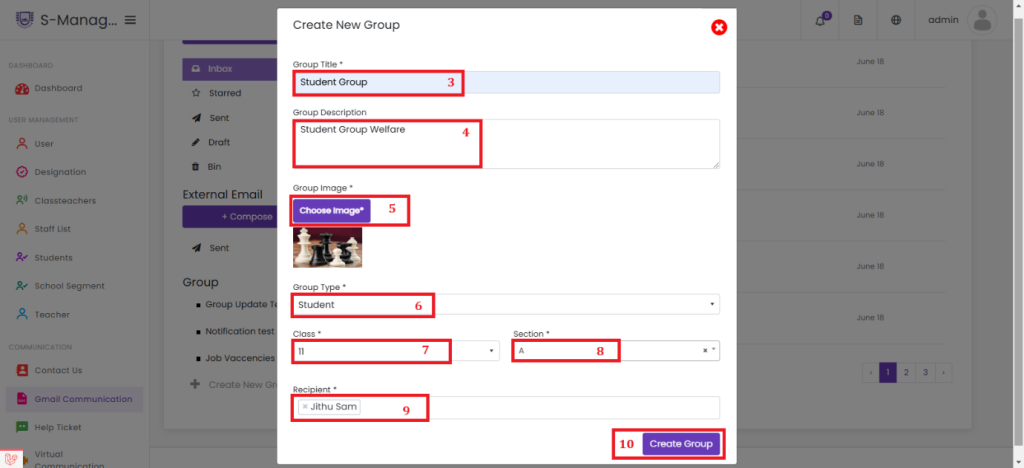
- Enter the Group Title
- Enter the Group Description
- Upload a Group Image
- Select the Group Type from the list additional fields will appear based on your selection
- Choose the appropriate Class from the list
- Select the Section from the list
- Choose the Recipient(s) from the list
- Click Create Group to successfully create the new group with the selected recipients


