This module typically includes features such as student registration, profile management, academic records, attendance tracking, course enrollment, and performance monitoring.
Create a student #
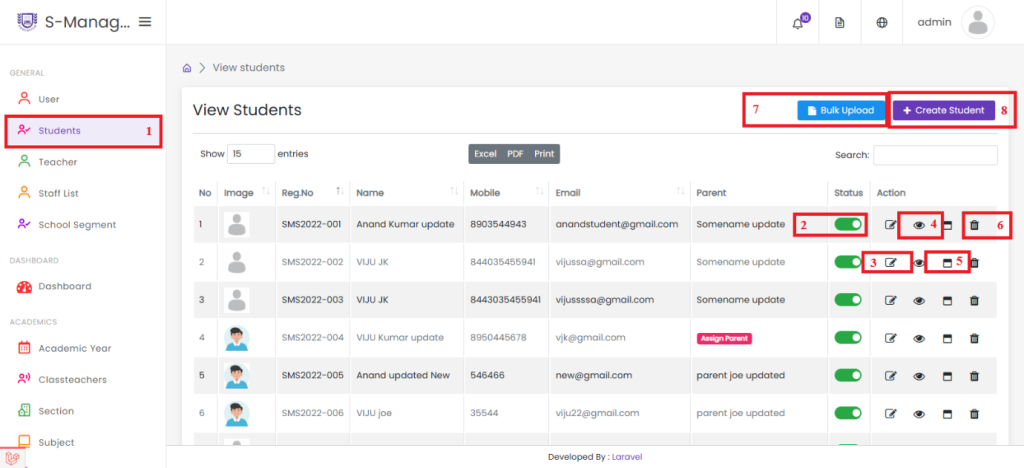
1. Click on Students.
2. Enable or disable an existing student record.
3. Edit the details of an existing student.
4. View student information.
5. Print the student ID.
6. Delete a student record.
7. Import student details using bulk upload.
8. Click to create a new student.
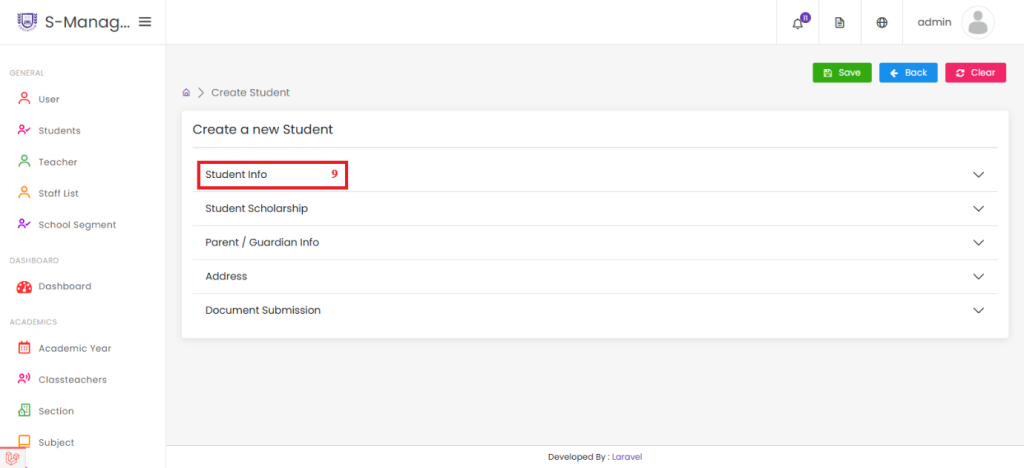
9. Click the Student Info accordion to enter student information details
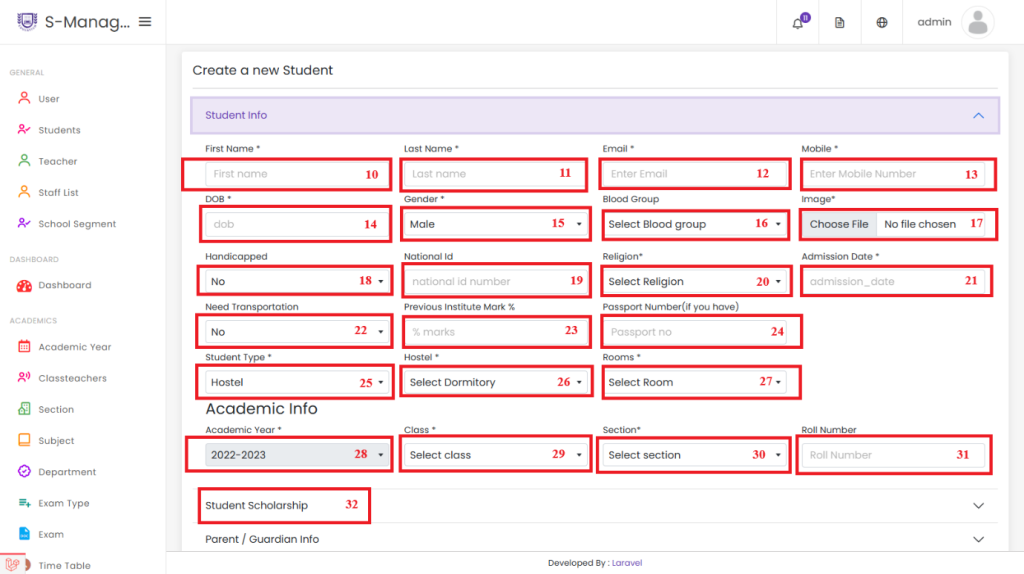
10. Input the student’s first name.
11. Input the student’s last name.
12. Enter the student’s email address.
13. Enter the student’s mobile number.
14. Select the student’s date of birth.
15. Choose the student’s gender from the list.
16. Select the student’s blood group.
17. Upload the student’s profile picture.
18. Select Yes if the student is handicapped; otherwise, select No.
19. Enter the student's national ID number.
20. Select the student's religion.
21. Choose the student's admission date.
22. Select Yes if the student requires transportation; otherwise, select No.
23. Enter the student's previous institute marks (in percentage).
24. Enter the student's passport number, if available.
25. Select Hostel if the student requires hostel accommodation; otherwise, select Day Scholar.
26. Select the hostel building assigned to the student.
27. Select the hostel room assigned to the student.
28. The default academic year is selected based on Site Configurations > Institute Details > Select Academic Year.
29. Select the student’s class.
30. Select the student’s section.
31. Enter the student's roll number.
32. Click the Student Scholarship accordion to enter scholarship details.
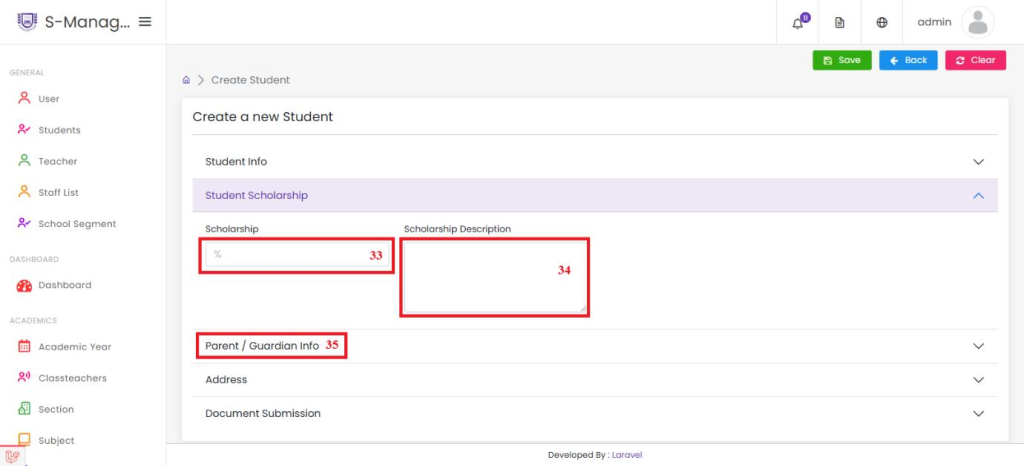
33.Enter the student's scholarship percentage.
34.Provide a description of the scholarship.
35.Click the Parent/Guardian Info accordion to enter parent or guardian details
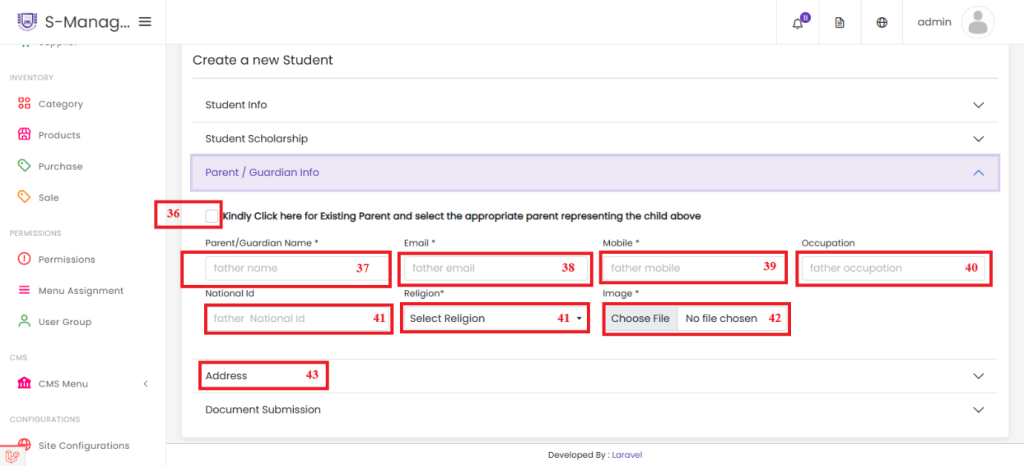
36.If the student's siblings have studied in the same school, check the box and select the parent’s email ID from the list. If the student is new, leave the checkbox unchecked.
37.Enter the name of the parent or guardian.
38.Enter the parent’s email address.
39.Enter the parent’s mobile number.
40. Enter the parent’s occupation.
41.Enter the parent’s national ID.
42. Select the parent’s religion.
43. Upload the parent’s photo.
44. Click the Address accordion to enter the student’s address details.
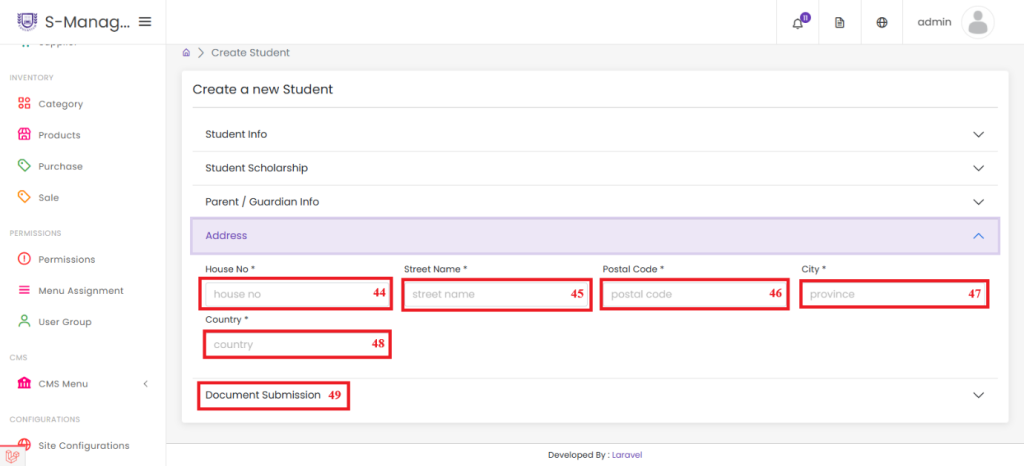
45.Enter the student's house number.
46.Enter the student's street name.
47.Enter the student's postal code.
48.Enter the student's city.
49.Enter the student's country.
50.Click on the "Document" accordion to upload the student's document details.
Note: The document must be less than 2MB in size.
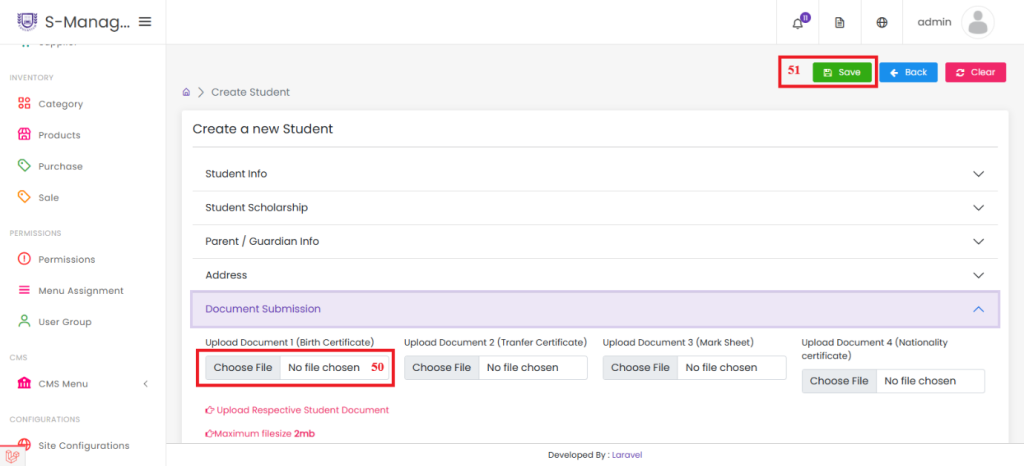
51.Upload the relevant document for the student.
52.Click Save to submit the entered student details.
Create Students via Bulk Upload #
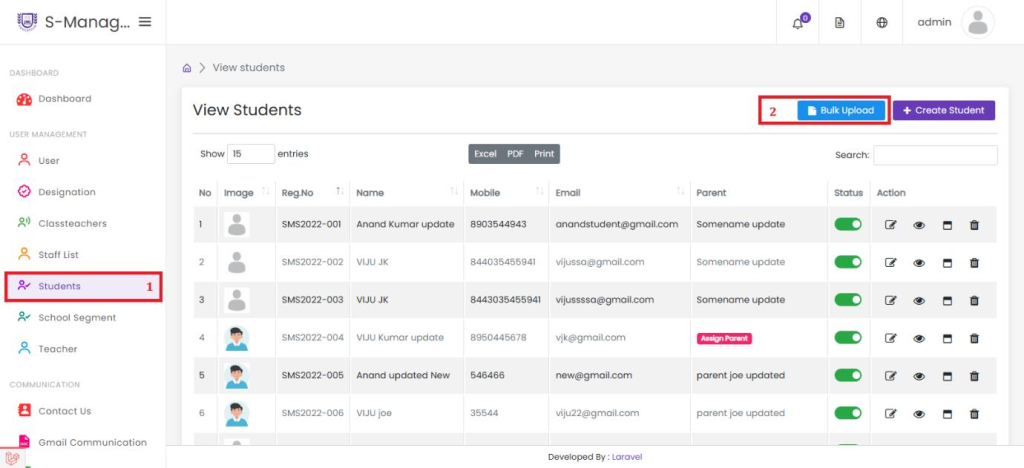
1.Click on Students.
2.Click on Bulk Upload.
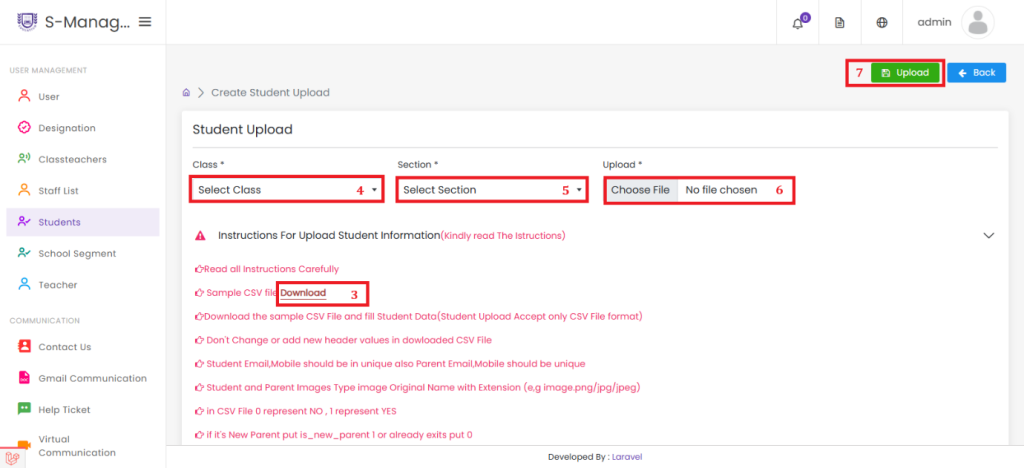
3.Click Download Sample CSV File and enter the student details in the downloaded file.
4.Select the Class for the students.
5.Select the Section for the students.
6.Click Upload to upload the completed CSV file with student details.
7.Click Save to successfully create the student records from the uploaded CSV file.


